Showing posts with label Wedding. Show all posts

Friday, September 30, 2011

Okay, No Really, We're Back!

Fail.


Thanks everyone for hanging in there.  Things have been a little crazy since the wedding with law school starting up, another wedding coming up, and a TON of DIY craftiness.  BUT, I am here to tell ya'll that we are officially back and better than ever!

Because I left everyone hanging on what our wedding was actually like.  I decided that the first post back would be my last wedding one.  All images are courtesy of the amazing KortneeKate Photography.  She and her adorable husband Ted shot our wedding photos and did a fantastic job!  Why don't I just let the pictures speak for themselves? Warning, post is VERY photo heavy!


My soon to be husband being all cute while getting ready.


The all love each other


THE dress!


I hand stitched APK into my dress for my hubby and my 'something blue'.


I told my stylist to make me look like a 'hippie goddess'.  I think she got it down!


Our first look at each other!


the boys.


That's my husband!


We're married!


the ladies!

 us

my flowers


The menu that I created using an old window, some paint, a sander, and a sharpie (props to my sister for actually writing out the menu)!


Cake!  Thanks to my father-in-law and brother-in-law for cutting the stand for me!


The sign I made to tell guests where to go.  It was so easy it does not even need a tutorial!


I told him I wouldn't shove the cake in his face.  Opps, I lied.


Fowers


Tossing the bouquet.


Dance party!  Or just Hark the Sound!


Yep, it's official, we're married!

Thanks for hanging in there during my hiatus!  Hope you enjoyed my wedding pics!


Friday, August 5, 2011

We're Back!

Remember that thing I said I was going to do in my last post?  Well, we did it!  Everything went amazingly well, the ceremony was beautiful, the toasts were amazing, and the drinks and dancing flowed!  I think everyone had a really great time!

Alex and I are over the moon about finally becoming husband and wife.  We have officially gotten our marriage license back from the county and I have filled out all the paperwork necessary to change my name!  I even took off the "cox" sticker on the mailbox yesterday, meaning that we are a house just of kings!  Addy is also very happy that her mommy finally has her last name.

The honeymoon was also fantabulous!  We had a great and relaxing time.  Once I get all of the pictures loaded and edited, I'll share!

Since we don't have any of our professional pictures yet, I'll leave you with a teaser from the photo booth that we had at the reception!


Saturday, July 23, 2011

Last Night as a Single Lady

Well, it's finally here.  Tomorrow, in 95 degree weather, Alex and I are getting married.....outside.  We had a great rehearsal, an amazing dinner, and went out with some of our college friends.  After Lo's ID went missing and her iphone was stolen, we came home.  As soon as we walked in the door I knew there was a problem........


Addy and Buddy had pooped a RIVER of diarrhea.  So, in 20 years time, what will I be telling our friends and family?  "Well on the eve of my wedding, I was cleaning up river-like diarrhea :(  Boo!

Anyways, tomorrow is going to be wonderful.  Poop free.  And I'll be marrying my best friends.

See you on the flip side!

Wednesday, July 20, 2011

Jenny Craig Week VIII Weigh-In

Another week another pound and a half!  This puts me at around 17 pounds lost from the end of may until now!

My goal was to reach my half-way point (around 20 lbs.) by the time the wedding hit.  While I have not and will not accomplish this by Saturday, I am still very satisfied with my results, the weigh loss, and how I look.  I picked up the dress today and what a saga it has been.  I went into my first fitting and the seamstress could hardly do the dress up.  It was a RUDE awakening, partially prompting my pre and post wedding diet.  Every time I went back the dress kept getting looser and looser until finally, at my last fitting, she had to take it in an inch on both sides!  I went to go pick up the dress today and she looked beautiful and very tiny since being taken in.  I opted not to try on the dress one more time, and instead, the next time I put it on will be my wedding day.

In other news, it looks as though the wedding is going to be steamy HOT!  We ordered some huge fans to put around the reception space just to get the air moving a little bit.  Say a little prayer that there isn't a heat advisory this Saturday :(

Want a sneak preview of part of my wedding day look?  Okay here it is!


Anyone have any advice for a soon-to-be married couple?

Friday, June 24, 2011

Jenny Craig Weight In Week IV!

Hello there all.  I tried to write a post about our fabulous home yesterday but blogspot decided it didn't want to co-operate.  Anywho, yesterday I had my fourth weigh in at Jenny!  I lost another 1.8 lbs. bringing my total to around TEN lbs!  Jenny also does measurements every month to see the progress you have made in your overall physique.  After all of the hard working out, dieting, walking, etc.  I have lost 8 inches off my body.  That's almost a foot yo!

I still have the 20 lbs goal for the wedding so i'm kicking it into high gear!  As of yesterday we only have 1 MONTH to go!  With so much going on and all of my DIYing, don't be surprised if you don't hear from me as often = SAD FACE :(

What better way to celebrate your one-month-until-your-wedding anniversary than by going to your second dress fitting!  Last time I went to go see the gown it was NOT pretty.  Nancy and the seamstress basically had to brace themselves with the wall to get the dress zipped up.

Exhibit 1: BACK FAT


                                                                       {source}

 Okay, okay, maybe it wasn't that bad, but for realz.......IT WAS BAD!!!

WELL, after the weight loss.....there is ZERO back fat (and even if there is, you better not say anything to me about it at the wedding)! 

EXHIBIT 2: ARMPIT FAT


Girl, I feel your Paaaiiiinnnn.  Unfortunately, the armpit fat still exists.  It's better than before, but it could use some work.

EXHIBIT 3: THE SKINNY ARM POSE


Yes, it is a way to minimize the armpit fat.  No, it is not how I want to be walking around on my wedding day.


Other then that, the dress fits like a glove.  In fact, I lost so many inches off by body that the dress "dropped" and so it has to be hemmed again!

Anyone have any tips to get rid of that pesky armpit fat?

Thursday, June 16, 2011

A Twist on Traditional Invitations

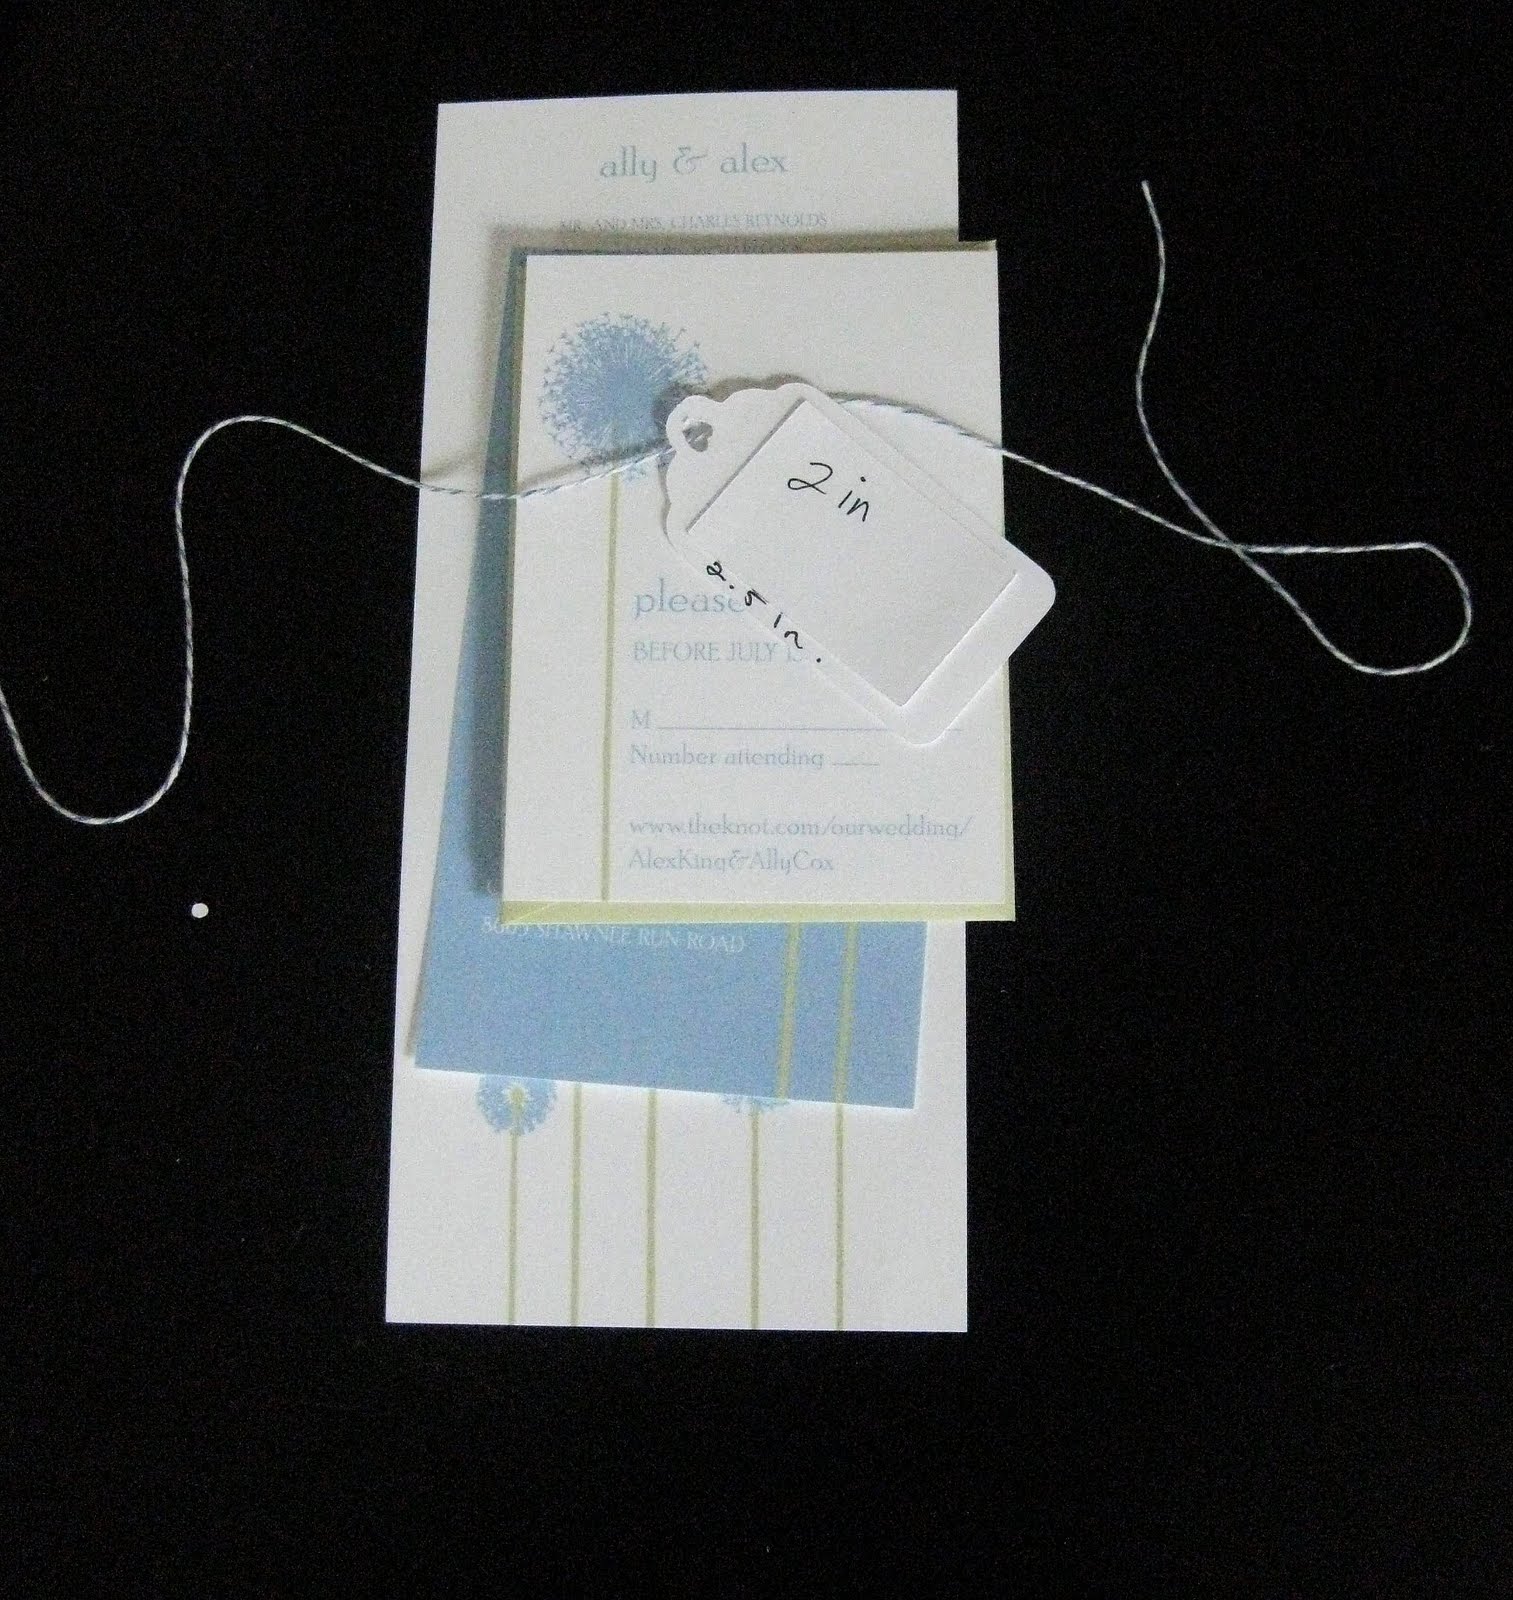
As promised, it is time to post my invitation process.  When Alex and I picked our wedding invitations, we knew we wanted something different from the standard ivory paper and black type.  We ended up choosing an invitation sweet that matched our style and our budget.  Because we had so many pieces to our invitation, I thought that some type of belly band was in order.  Naturally, I didn't want a traditional belly band so thats when the baker's twine made its way into our invitation sweet......BUT being the perfectionist I am, I wanted to add some kind of personal touch for the recipient....and then I came up with the idea of TAGS!

The first KEY part of this project is a Cricut machine.  Without this handy machine, this project would have never happened (who wants to hand cut 150 tags?).  I knew what I wanted my final suite to look like, so I made a template.


It took some trial and error to decide how big I wanted the tag to be, but I figured it out eventually.  It is important that this step be done using scratch paper, as the paper that you will be using for your final project is generally more expensive.

Because I used a standard sized piece of scrap booking paper, and my machine can only take 6 inch wide paper, I had to trim it down (don't worry, I fed to excess into the machine and made tags from it as well!).


The next thing I did was lay the paper on the Cricut's self-adhesive mat, punch in the shape and size that I wanted for the tag, and let it rip!


Once I let the machine do its magic I was left with about 8 tags surrounded by extra paper that could not be used.  I peeled away the excess paper and used my handy spatula tool to peel the tags off.


I followed the same process for the colored part of the tag.  After a LONG afternoon of DIY Network and cutting I was left with a few cute little stacks to tag pieces.


I made both blue and green tags because I didn't want too much uniformity among the invitations.  Also, if you look at the blue tag, notice that the hole is a heart!  I did this with a cute heart shaped hole punch I found at Michaels.

Next, adhere the label part of the tag to the tag itself.


And stick.....


Et voila!  Cute tags to send along with your invitations.


See the green one?!?

After all the tags were done, I whipped out my guest list and individually HAND STAMPED all the guest's names in a typewriter font on them in a light pink chalk ink.  I then wrapped the entire suite in the twine and attached the tags.  I must say, they turned out really cute and I am SUPER happy with them!

As always, I had a trusty companion at my side the whole time!


As always, subscribe to my blog!

Friday, June 3, 2011

Fun Votives

 No wedding table is complete without a few votives.  Not only do they give off romantic lighting, but they also really pull a tablescape together.  I knew that I wanted votives and while the wedding venue does offer them, I wanted something a bit different.  A while back, perusing my fav shop etsy, I came across frenchfelt's sweet lace napkin rings.  I took her idea and rolled with it, creating my own take on the classic votive.  Here's the tutorial!

Supplies:

votives (any size will do)
scissors
lace
hot glue gun


I got most of my lace from a vintage store in town.  The rest of it I got in the Joann's sale bin for $2.50 a roll!  Votives are a pretty standard craft store item.  I got mine from Hobby Lobby using one of their 40% off coupons  online (if you have a smart phone, just pull up the coupon, show it to the cashier, and they'll be happy to accept!) SCORE!  The first thing that you are going to want to do is measure the circumference of the tea light.  Because I HATE measuring, I took the lazy route and just wrapped the lace around the light leaving a bit over overlap where the two ends come together.

Glue one end of the lace onto the tea light:


And wrap the lace around:


Secure the the lace with a bit of glue and trim the overlap.  If you want to be extra fancypancy you could fold over the end of the lace to make a nice hemmed edge.  I'm lazy so that was a no go for me!  Do that a million and one times (and a few DIY Disasters later)....and you'll have plenty of romantic votives!


This project was super easy and fun.  Feel free to send me your take on my tutorial!